Thursday, 9 January 2014

Cher Llyod's makeup look

I wish I had style, I wish I had flash, Wish I woke up with a butt and a rack

Oh Cher pfft you dont need any of the above. 


If Cher sees it and she wants it, she gets it. 
In this song "I Wish" she dreams and wishes that she could have what she hasn't got (What Cher damn girl you got everything) But by the end she walks out the bar and gets followed out and I guess the moral was just flaunt what you already have and you can have any man after you hmmmm close enough.


Lets get a close up on the facials that give the look the real x factor ;)


Nothing give a nice healthy glow like a some cheeky smile. However what really shows that big smile is those cheeks. However Cher already has a very small head, so her cheek bones already stick out, so no need for any bronzer, however rather than using a heavy pink blush this look has used more of a pale pink, In this case I reckon that it matchs very close to this "Dandelion" By Benefit cosmetics. I find this colour matches with any brown shades so if you do require a brown line on the cheek to get chers bones line then this product will still give you Chers cheeky smile look.

Next we have Cher's next face "Clearly I like them dumb"
This is where Red Lipstick is your best friend, Its classic, sexy, matches everyone and wont make your teeth look at yellow!!!
For this I used the "model co lipstick party proof range".
My fav and the one that matched Cher the most is the reddest one in the pic below.


And for the final face "Humble Bumble".
Chers eyes should be more than famous in my eyes. She can pull off any style with just her eyes, as shown before she can glare, she can stare and she can play nice. 
How she can make this look go along way is starting with the brows, her look is always tidy, and show a different message on each mood, raised= grrrrrr normal= :'(((( 
She also uses minimal eyeliner and sticks to neutral brown shades and depends on the fake eyelashes to widen her eyes for the overall look.

For the products I reccomend "Natio Eye brow kit" , "Benefit Greetings from Cabana eye shadow palette" and "Australis eyeliner"


If you really decide this look isnt for you just stick a couple of capsicums in front of your chest ;)


Signs that tell you, you're a makeup bag hoarder.

Good makeup takes time!!! ask any chick that :)
And sometimes life will throw wind, rain, or tears that will not agree with our fresh look of the day.

so when your out its understandable that its essential that you should bring along a few pieces for insurance.

However sometimes you need to take a look in your handbag and go "ENOUGH IS ENOUGH". 
Here are my top tips of signs that you need a change in your bag  Lifestyle. 

Number 1

These are my old habits:
Broken Foundation
Old foundation samples
Foundations that arnt even my skin tone but close enough
A huge hair brush
Multiple Lipsticks
Lip glosses
Eye shadows 
Bronzers and blushes
Dry shampoo
Mini Makeup brushes
Eyeliners (White and Black)
Mascaras
Hair ties and bobby pins
and full sized hand creams


The first sign to fixing a problem is the owning up to a problem. 
If you can say "I use bigger handbags bc my makeup bag wont fit" or "I try to fit all my bathroom essentials in here".
Then keep reading!!!!

Number 2:
Not knowing how to get rid of anything.
We all have our reasons for each piece that constructs a need for each item. my personal fav is "Well a friend may need it while im out with them"
No!!! they most likely have the same problem as you girl.

Lets look at that list again shall we?!?

Broken Foundation  These can always find away to fall out into your bag making it a bigger waste and unclean to ruin other products

Old foundation samples When on the street you may be given a free sample, take it home. You dont know what the product can do to your skin if you havnt tried it.

Foundations that arnt even my skin tone but close enough Nope, save it for the house mix moisturizer with it or find a friend who may want to trade with you. this isnt a dumping ground!

A huge hair brush  your brush can hold oils and dandruff and with it just sitting lose it can make its way to other products in your bag that may have a lose lid.

Multiple Lipsticks I always forget to take out a lippy before I put the next one in. The more lippy the more they rub and can crack so all that hairbrush dirt can get in. rule of thumb: take a lippy out then put a lippy in.

Lip glosses  Lipgloss and a lipstick one of each. Your lips wont fall off with out them, you may get chapped lips but I find it hard not to suck all the yummy lipgloss off and that kills my lips.

Eye shadows ,  Bronzers and blushes   makeup bags are for touch up. you dont need the whole bathroom in your makeup bag. adding these over what you already have cna just look cakey and having these things will never fix anyting second time round.

Dry shampoo  This is my quick fix, but if you get oily hair like me, you should put it on before you go out. If you really need it after the gym, buy the travel size bottles and keep the lid, it helps so any accidental spraying to contaminate other products in there.

Mini Makeup brushes  these are no good if you dont have the right products for them, not only that is mini brushes are just never as good as your ones at home. Just take em out!!! - they also carry old bits of makeup to add to the mix of debris hanging around.

Eyeliners (White and Black),Mascaras  Some times we rub our eyes, or we go for a swim, or we have had a bad day. But your eyes are vulnerable areas. if they are even slightly irritated adding cosmetics to them will not make you look any better. just wait a bit till you get home. And as for loiquid eyeliners they take time, if your needing to re do your eyes, then dont even try unless you want to end up like a panda or locked in a public toilet for ages.

Hair ties and bobby pins you never need more than three bobby pins, if you do then your hair is not fixable with them. hair ties and bobby pins are know for just sitting in your bag,  they pick up all the yucky bits and lets be honest if they arnt on your wrist you always just ask your mate instead.

and full sized hand creams These are not made for bags, they are big and have to sit with other things. Instead why dont you moisturize them when you are at home or just bring a small bottle made for makeup bags with you?

Number 3
Have fun clearing it out!!!
It came great joy to me as things I thought that were missing I found!!!
Buy a new bag, or wash out your current one. Its important that your bag is cleaning bc what goes in there you rub on your face.


This is what I carry in my bag now

A brush  on foundation / Illuminator.
-If I get splashed in the face or I need a touch up. I can just rub this over my face and it re blends everything bad into order. It also has its own Brush with a lid. So when it sits in my bag nothing can fall out or in of it, so it remains clean.

Concealer stick
If a blemish pops up this can just dab on easy. Once again it comes with its own brush for application.


Mini Eyeliner
If you do a little smudge this can be use for a quick touch up, however it wont do a full job on your eyes. And yes it has a lid and a twisty thing for hygiene.

Luch- Lip scrub
If your lips do peal and chap and your about to go meet your loved one, this will remove all that unwanted dead skin. Dont try chap sticking it when this simple pot will work for hours and hours.

Two in One Lipstick/Lip gloss
If you cant get your head around switching your lipsticks for each day, pick one that goes with multiple looks, with the lip gloss you get a nice pink, without the lip gloss the lippy remains red.


Hope this has helped out those in need!!! 
<3 Please comment  what your hoarding problem is <3
  

Tuesday, 7 January 2014

Make up organizing using $2 shop food containers.

I am such a messy person. I organize something bc I have to not bc  I want too.
I loved organizing my makeup, however when I go to apply my makeup the next day, everything always ends up on the floor :'(

So I went to a discount store today and saw these bright party food wrappers. And lets just say my creative bone kicked in hahaha. 


^^^ These products I bought all from "Uncle Bills", except the cupcake holders which were from "Pete's Emporium" 

They all cost under $4 for the pack of what they came in. and had different amounts in terms of quantity

.


Drinks cup NAH UH!!! A key issues with brushes is that it is sooooo hard to find something for them to stand in. This not only helps me find a brush super easy and fast, but the height is perfect for brushes, so that you can where each brush is, but is stable enough to not knock over. 

I also found that if you put some makeup remover in the bottom of one and then put your brushes in upside down it soaks them and makes cleaning them easier, WITHOUT USING WATER. and as you may know water can make the bristles fall out.


Sorry ladies, what lies on the lips is forever on the hips, so no gelato today :( However I found this super helpful for storing round items. My blushes, My bronzers all come in round shapes. And its soooo hard to fit that or stack them so its an easy mess to make.  I found each container can fit about two blushes or round items, and have a sturdy base, bc as said earlier stacking can be hard for a lot of blushers and bronzers so this will add some strength in comparison to the cupcake holders.


sooooo for $3.60 for only 50 of these cupcake holders, I had to think of some good ideas. They arnt as strong as the other food containers. But they are just strong enough to hold a perfume each. It may look a little weird that I randomly did that. but in fact it can make the perfumes look tidy without organising whats behind them. I went for three perfumes that had interesting shape to them and when I look at my shelf I dont see clusters I see mmmm they look cute. 

This is probs my personal fav, but they hold the perf number of lipsticks and lip glosses. I can fit about six per holder and if you like me and dont have a collection of the same brand lippys this can make them easily look organised. 


If your anything like me, I cant even begin to control my eyeliners. I lose the lids, and I lose them all together. However using this funky popcorn box you can just put them in and leave. These boxes dont stand as well as the drink cups, however they stand perf for my eyeliners, as they are a little lighter and have a heavier base. Eyeliners come in all sizes so this is a perf idea at covering up the fact that you dont have the time to keep an organised collection of eye wear. 


Monday, 6 January 2014

Makeup tutorial -Clubbing cover up.

Okay so im going out tonight clubbing with my gals, and as usual there will be millions of selfies taken.
I love selfies however I'm not even close to ready yet.
Most people in clubs CAKE themselves in makeup to look good, and not only is that bad for your skin it makes you sweat more and any drop of liquid on your face can leave a bad look.
So I went for the simple cover up my blemishes and I hope you like it

 okay lets start with the tools, Ive lettered them for reference.


READY TO GO!


Yup, no make up or anything uggg I KNOW UGLYYYYY...lets change that


Okay  so I have started with using the rimmel foundation (A), I then used brush D first to apply the foundation in the hard places (under the eyes, corners of nose and hair line) I then used brush E to then finish off. I used the brush by using light round motions so its spreads better and gives you an even coat. If your white like me you may want to even go below the face and ad a hint on your jaw and neck line.
I then went and use concealer(B) on the spots that still came through.
And finally to make a smooth complexion I used brush F to put some white powder/translucent powder (C)over the areas that hadn't dried yet, and over my hair line and jaw line to insure I had no orange lines.


Contouring, this can help shape, cover up and do many  wonders to your face.
I start with using brush G to apply bronzer (L) to my temples, nose and cheek bones,(If you are unsure where each of these are, please read my post on contouring for a detailed image) as you see its quite heavy because I have a blending brush, if you don't have them and are using normal brushes I would recommend going much lighter.

I then used the white eyeliner (O) and scribbled it on my forehead about my nose and on my chin, and a little bit above my lip. I then used the "Cool effects" cream (M) and spread it over the area I place the white eyeliner on my forehead and smoothed it down to the tip of my nose, right over the bronze. Please note that it only took a very small amount of this cream, and if you dont own this then continue the eyeliner down to the tip of your nose. I then used brush H starting with the forehead and blending it with the bronzer in circular motions, down the nose and then the chin and above the lip, so the white is gone but you can see it has a different colour in your skin tone. I then brush over the bronzer on my cheek bones so there is no visible line, but it gives the illusion of a cheek bone.

I then place a very small dab of the highlighting cream (P) under each eye to remove any bags. If you dont own this once again you can use eyeliner or a light concealer. Then I used brush I and dabbed it over the cream, like a sponge. By the time you are done dabbing you should have a lighter area of skin, but not notice able. the area you you dab it is right under the eyes and bring it down to as low as about half way down your nose.


After contouring you should end up like this.
There should be more outlined parts of your face and you should have an even tone, with no redness showing.


And now the last touch ups. I used the blush from this benefit kit (S) above my cheek bones using brush J. and then covered my whole face with a light dusting of the illuminating wand (R) to help lighten my fave a bit. and using brush K, I fill in any lose gaps in my eyebrows with some gel. and then using my benefit mascara (T) I do the top and bottom lashes to open and shape my eyes more. and finally a spray a bit of finishing spray (Q) to keep my look holding for the whole day. and without a doubt I picked a barbie pink lipstick. And let your hair down!!!!!


And if this look doesn't work out just pull a silly face and know body will even notice a blemish :)

I hope you like my look, and please comment for any questions :)

Saturday, 4 January 2014

Which White is whitest?

Okay so if your anything like me you ALWAYS opt for the most pale shade available. and that can be hard if you like me and your face is sooo much white than your hand or wrists. so you cant test to see if they are right!!!!

I tested some of my personal favs and some that have been a real disappointment for me as shown below. I gave my 1st, 2nd and 3rd for not only was the whitest, but. for what gave good coverage, what was easy to spread, and the least oiliest. And of course what I wear the most everyday


For this test I placed a small blob of the foundation and smeared it with a brush as far as I could go.

As you can see some aren't even that white!!!!! grrrrr this wasn't on purpose !!! some bottles say ivory or some bottles (the Calvin Klein) aren't even the right match


Friday, 3 January 2014

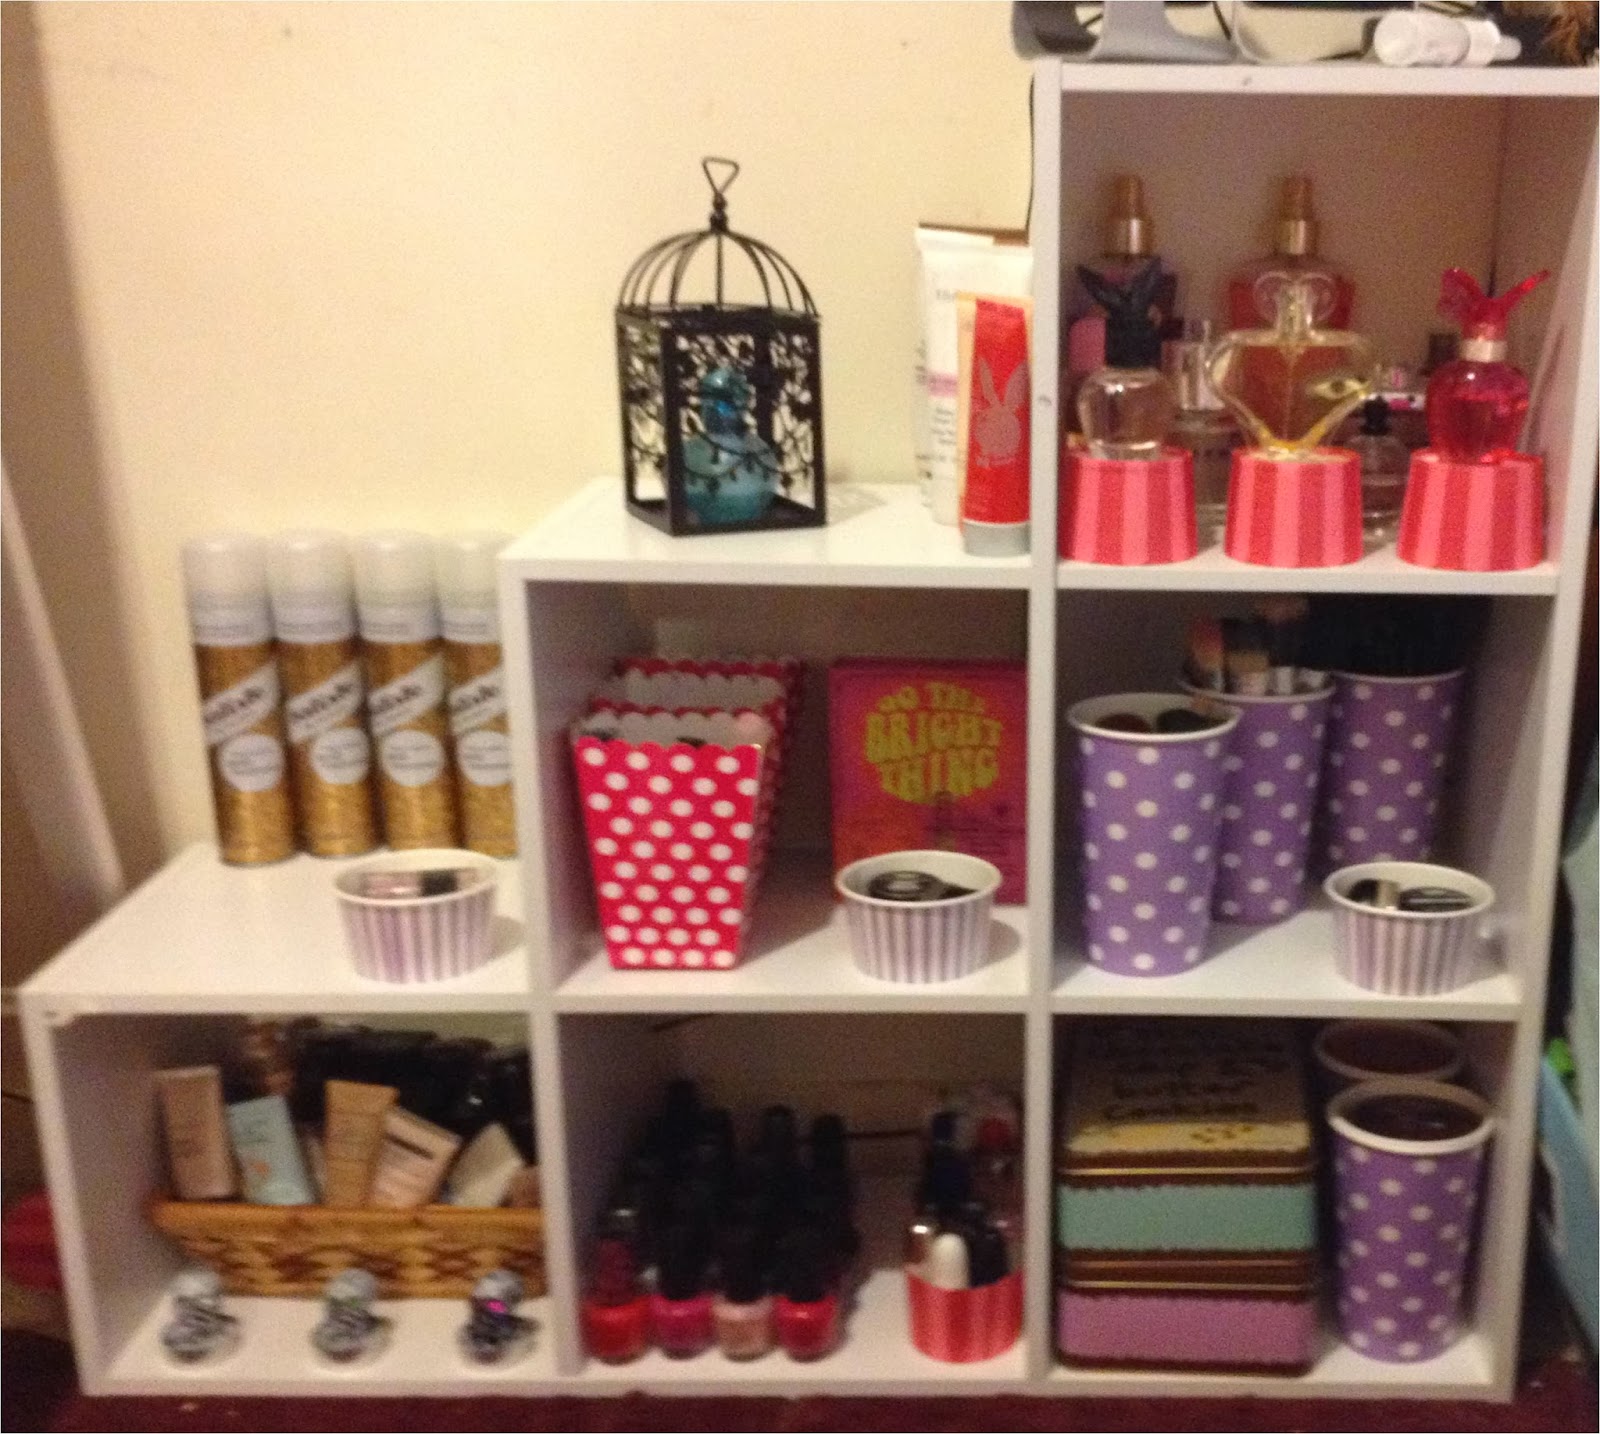
Makeup organizing for under $30 !!!!!!

Okay so before I start,I know I dont own a crap load of makeup like all those AMAZING beauty gurus out there, but from Kmart I got this AMAZING SHELF FOR $30!!!

I hate cleaning and organizing more than the average person but I had a great time making this up and all sorts. 

ALSO for $50 extra you can get the matching mirror that is all made up, is free standing and you can look at your whole body in one glimpse!!!! Hehe I asked santa for that :)

I also used  under $6 to get the stripey cupcake holders (a pack of 50) and the dotty holder things (8 in a pack but mine came with nine churrrr)

P.S this looks way better in real life, from this angle it looks messy, but hey I never said I was good at photography xo


Say No to Knots!!!! PROTECT YOUR HAIR

Ladies and Gents with long hair will agree with me when I say "I HATE KNOTS"
The key problem is that the longer the hair, the more knots, but I'm just not ready to cut my locks off :(


And Just when you think that the knots are gone, ONE STEP OUTSIDE IN TO THE WELLINGTON WIND, and its back to the start. :'(

these tips are honestly this can be hair saving !!!


"best solution: brush ur hair. Others r:Don't you hate it when your hair becomes so tangled up that your hair ends up looking like a big mess? We all have our own experiences when it comes to hair tangles and they are not really pretty memories that we would want to cherish or reminisce. 

The good thing is that there are proven techniques on how to stop your hair from tangling into a complicated maze of hair strands and how to deal with it if in case it happens. 

1. Use a volumizing shampoo if your hair is fine or thin. Usually fine and thin hair are prone to tangling and by using shampoos that add volume and movement to thin strands, you can minimize the chances of encountering tangles with your hair. 

2. Rinse with cold or cool water. Cold water helps close the cuticle, which not only adds radiance to the hair but also prevent many forms of hair tangles. 

3. Avoid rubbing your hair vigorously with a towel. After taking a bath, people usually dry their hair by rubbing with towel. But this can only cause more tangling. The better way to dry your hair is to blot it gently with a towel. 

4. Use a detangling spray or conditioning product that will help reduce hair tangles. It can be in a form of leave on conditioner that you can apply on the area where most tangles occur. 

5. Do not use a brush on hair that is already tangled. Remove the tangles first by gently pulling the strands with your fingers or a wide tooted comb. 

6. Make a habit of combing your hair from the bottom upwards. 

7. Do not allow your hair to fly freely in the wind unless you want to have a hair full of tangles afterwards. 

8. Never wet your hair when it is already tangled because this will only worsen the situation. Instead, spritz the tangle with a shine serum spray and then massage the knotted area with the palms of your hands. This will help loosen up the tangled area. Untangle with your fingers or a wide toothed comb afterwards. 

9. Use high quality hair irons. Hair irons like Corioliss straighteners are great for giving your hair a straightened look that is free from frizz and fly-aways. Hair that is smooth and sleek is less prone to tangles. 

It is always smart to opt to buy high quality hair irons such as Corioliss straighteners because these are equipped with a negative ion technology that produces radiant and beautiful hair without the fuss. 

10. Untangle your knotted hair immediately. Do not wait until tomorrow or next week until you do something about the tangles in your head. "


Yes I know that is ALOT steps but you do have to brush your hair everyday, if your like me and this can make a hugggge difference!